You've added an item to the cart! ×

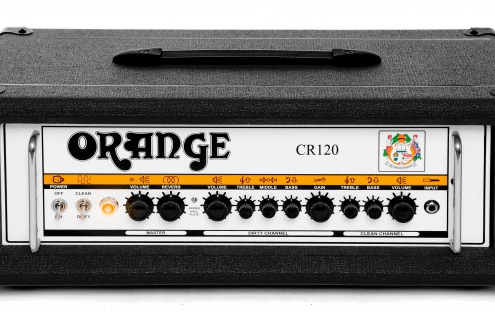
Orange is celebrating its 50th Anniversary in 2018 and to celebrate we shall be taking a look over the next twelve months at some of our most famous and beloved amplifiers. To start we take a look at the Terror series.

Tiny Terror

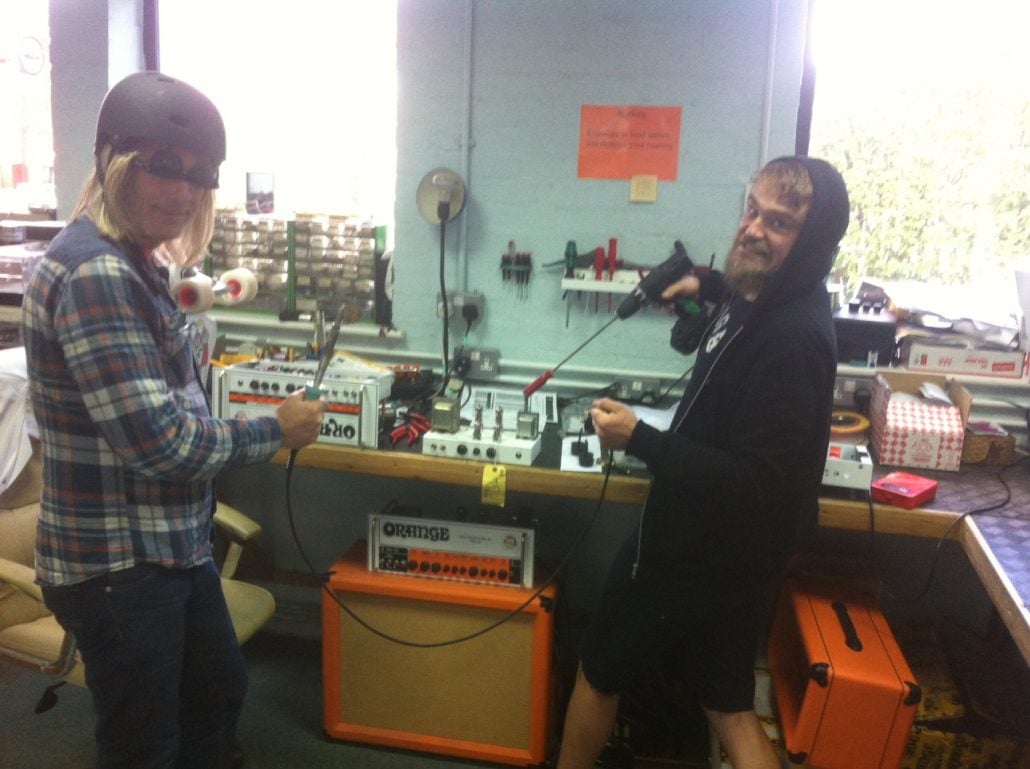
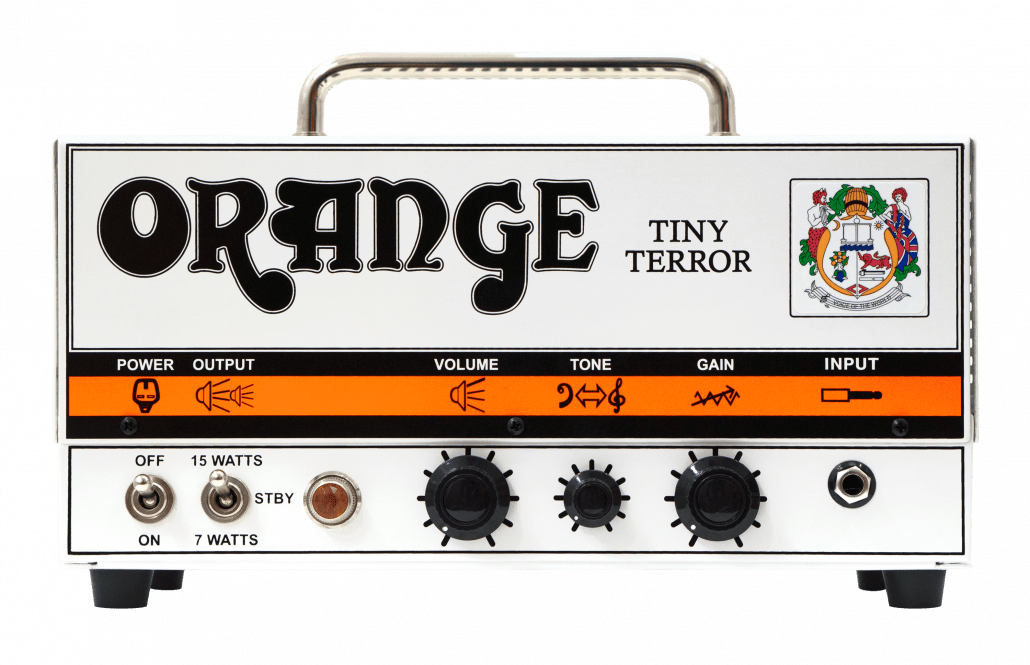
The one that started a movement and became an instant classic, the Tiny Terror was a benchmark in amp design. As Orange’s Lead Designer Ade Emsley recounts it all came from a dinner at NAMM:

“The original Tiny Terror idea was conceived in a restaurant at NAMM with one of our sales guys. I just kind of said ‘I’m going to make an amp that fits in to an A4 piece of paper.’ He said ‘no you are not, don’t be silly!’ I said ‘yes I am!’ That was where the idea came up. So I built a prototype. That sales guy turned up a week later and I was like ‘I have done it!’ He was like ‘what?’ I was like ‘that amp that fits into an A4 piece of paper.’ He called me a mad bastard but then I cranked it up and he didn’t think I was so mad after that!”

The idea went from prototype to production, but the core idea of having a portable, giggable amp never faltered. Ade explains:

“The concept of the Tiny Terror was an amp you can carry anywhere. You turn up to play a gig and there are three bands playing. You turn up with your Tiny Terror in its gig bag and your guitar. Before the gig you’ve sorted out the use of a mate’s 4×12 in one of the other bands. Plug in with the volume on ten and the gain on about six and suddenly you’re into 1980’s AC/DC territory.”

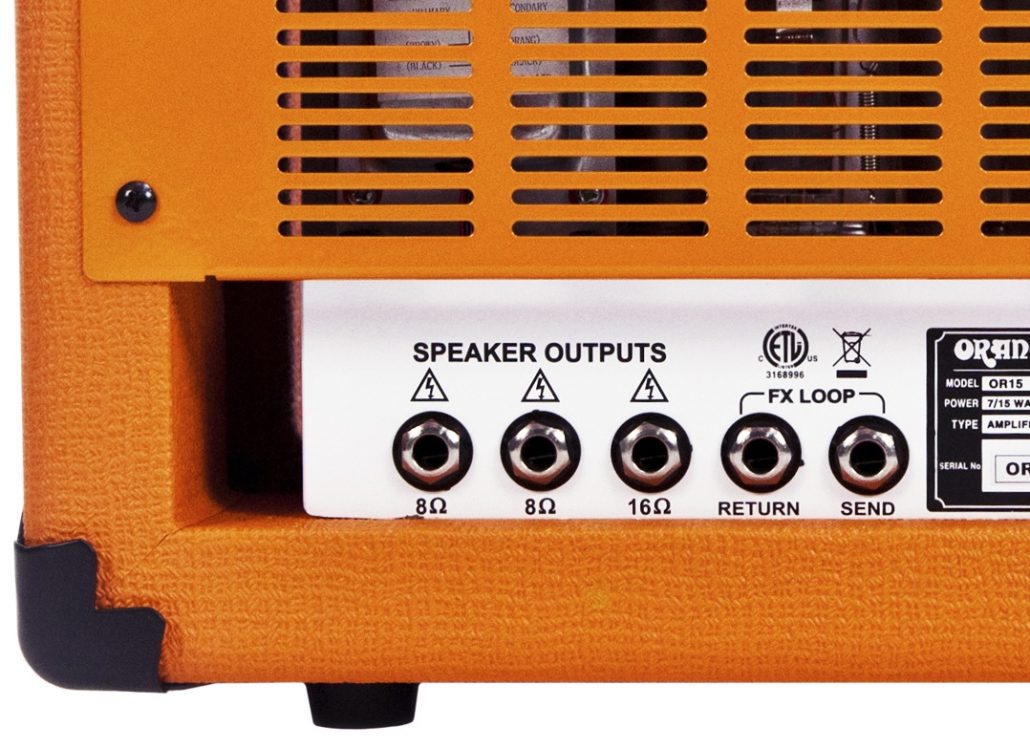
The Tiny Terror became an instant classic and is still one of Orange’s most successful amplifiers and started the still prevalent trend of lunchbox amplifiers. In the first year of production 10,000 Tiny Terrors were sold.

Dual Terror

After the success of the Tiny Terror, thoughts turned to a new amplifier to add to the Terror range:

“I thought it would be nice to have two Tiny Terrors in one box, so you could switch between channels. You could have one cranked more than the other like the level for leads, so we did the Dual Terror.”

The Dual Terror is a 30 Watt, two channel, 4 X EL84 Terror head. It has a “Tiny Terror” channel and a “Fat Channel,” which is voiced warmer with more bottom end, gain and crunch.

“People had been asking for something similar to the Tiny Terror but with more power.”

The Dual Terror was also the first Orange amplifier to have the 4-to-2 tube switch to change the output valves of the amplifier.

Dark Terror

“Some people started to ask me for a Terror with an effects loop, which we called the Dark Terror. I had to change the preamp to make it four stages of gain. This was because at lower levels of gain it will drive the power amp when you are not using the effects loop, as any distortion you do after the effects loop will kind of make the effects loop useless. It only works with time-based pedals if the overdrive is made before the effects loop send.”

The amp was the first step into a high gain Terror and came with a shape control.

Jim Root Terror

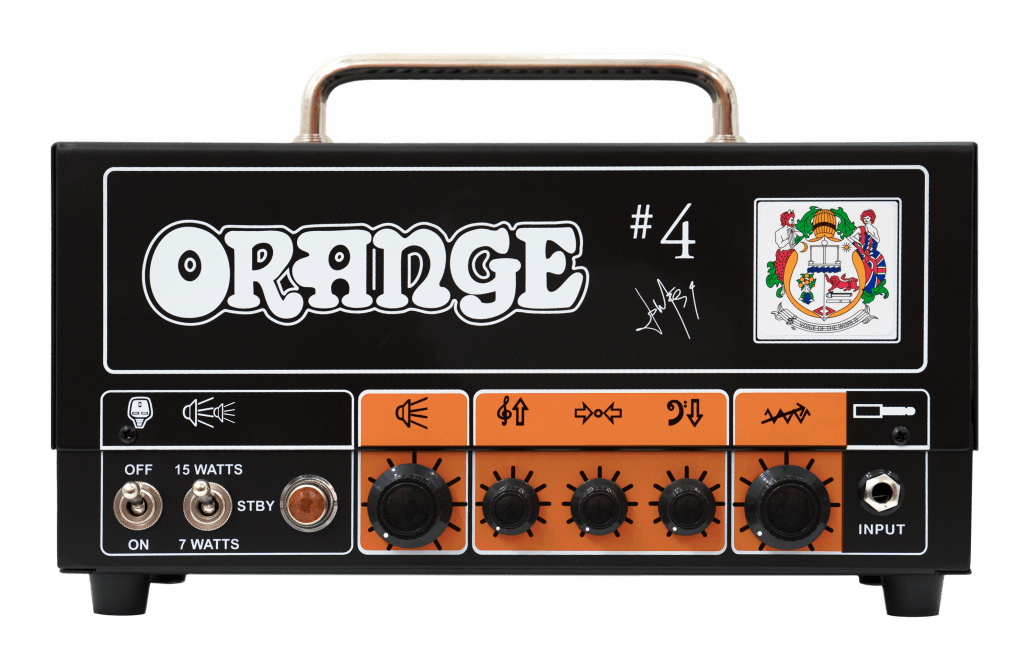
Orange had never made an artist signature amplifier until we did a Terror for Jim Root of Slipknot. Ade explains the decision behind choosing a Terror

“I had heard he was wanting a signature model that was affordable to his fans; he didn’t want anything super high end. So I thought why don’t we do a Terror and put his Rockerverb channel on it. Instead of going cheap, we can go smaller and get the cost down that way. Then you have something that is affordable, that is all tube, that is built properly, and that sounds really good.”

The Jim Root Terror’s sound was taken from Jim’s Rockerverb MKI he used on tour and in the studio, and it gave fans the tone of Jim Root in a portable and affordable amplifier.

10th Anniversary Terror

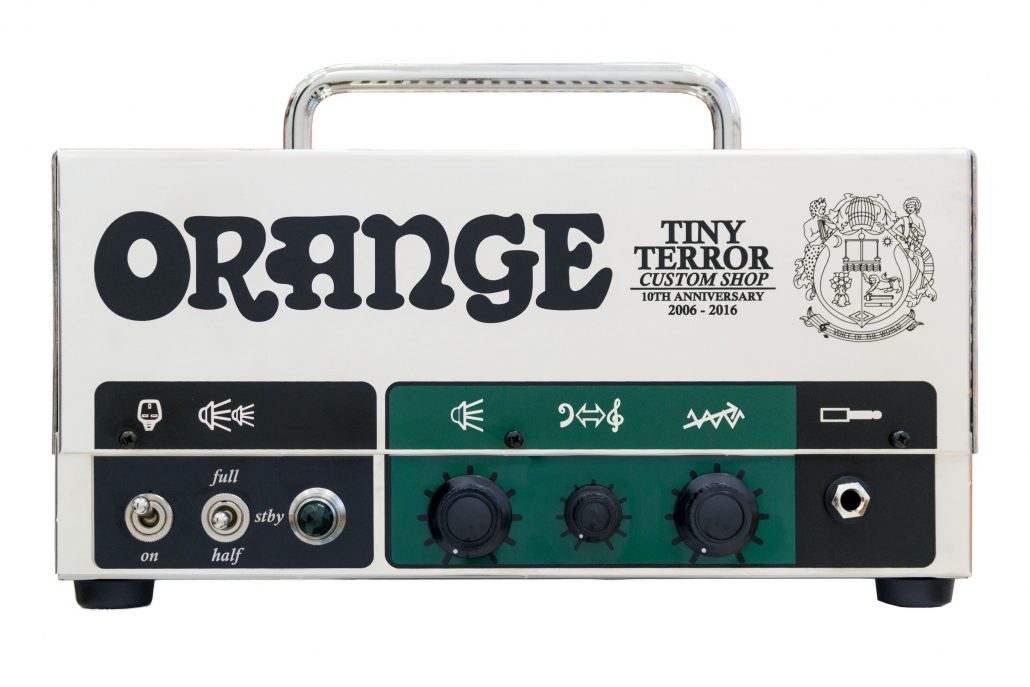
The “Shiny Terror” was a limited edition Terror to commemorate 10 years of the original Tiny Terror and mark its discontinuation:

“We wanted to give it a Viking funeral! So we did a small run of stainless steel Tiny Terrors, handwired and built in the U.K. factory.”

It was sold with a matching PPC212 cabinet in British racing green, with Celestion Gold Alnico 10″ speakers. The Terror head and cabinet was only made in a run of 110 amplifiers.

The Future…

With the Tiny Terror being discontinued in 2016, and the rest of the Terror range still going strong, what does the future hold for this amplifier series:

“Moving forward, we will probably do something new at some point. I’m not quite sure what that is going to be…I’ve got a few ideas…maybe something with two channels… we shall see how we go…there might be a few options…”


The Orange 4 Stroke is a versatile, all analogue bass amplifier and it can be used to play a lot of different styles of music. So here is a quick guide to some of the sounds you can get from this powerful and versatile amp!

What is parametric EQ and how can it help?

Parametric EQ can boost or cut certain frequencies to change how your bass sounds. The 4 Stroke has four EQ bands, Treble, High-mid, Low-mid and Bass. At 12 o’clock, nothing is boosted or cut, the amp’s tone is unaffected.

Below this is the frequency control, these affect the bands above right of them.

As an example, if you want more treble you can find the right frequency and boost or reduce it.

Below are a few examples of how to achieve certain sounds with your 4 stroke:

Smooth Motown Sounds

Getting a smooth bass sound is simple with the 4 stroke, as seen below boosting the treble and cutting the lower and upper-mids will achieve this.

Harmonic Fusion Sounds

Cutting the high and low-mid frequencies , while boosting the bass and high-mids will give the tone a smooth sound and highlight the harmonics.

Slap Bass Funk Sounds

Using the built-in compression and boosting the bass and treble while cutting the mids, will give your slap bass a real punchy sound.

Rock Grit Sounds

To give you that real old school punk/rock bass tone, boosting the frequencies is the way to go. Cutting the low-mid frequency around 220Hz also helps the other frequencies to jump out. 3000Hz frequency being boosted to near full, will give a crunchy tone.

Look, man, I can’t come see your show. Not tonight, not at that festival in a month, and not in Japan (although thanks for the invite…but seriously how did you expect me to afford that?)

It’s not that I dislike you. It’s that I’m not in the mood to listen to your band play music. Because I don’t like the music your band plays all that much. In fact, I don’t even like the genre of music you play. And I consider myself a genuine connoisseur of music. That’s probably one of the main reasons I work in music actually.

But your band? No. It’s not my style. It was maybe my style 10 years ago. My tastes have changed.

The fact is, I go to lots of shows already. I’m out a couple of nights a week (though I’ve slowed down recently). I have a family. My wife doesn’t exactly love it when I stay out until 1 AM. But it’s reached the point where she’s subscribed to the Orange YouTube so she can be sure I’m actually doing interviews with artists and not just using my job as an excuse to get out of the house.

In other words: we’re going to have to figure out a different way to make the most of this endorsement. Because I’m not finding a reward in moshing with 19 year olds and there’s nothing in it for me to stand side stage without a reference monitor. Your live show is not enough to make me like or support you.

There’s a bit of a misnomer when it comes to artist relations reps. Everyone seems to think we like all the bands we work with. Well, we don’t. I mean personally, sure, I think they’re cool people and I admire all of the hard work they’ve put into becoming full-time musicians. But that doesn’t mean I want to listen to their music. In fact, I’d rather get electrocuted by the power transformer from a Thunderverb 200 than listen to some of the bands I support.

I just spilled the beans and admitted my disdain for the music of bands that not only do I support, but that also support me. Their loyalty to Orange is the backbone of our brand. How will they take the news I may not choose their music for my long Sunday drives?

Well, if they’re professionals, they’ll tell me to get bent and then we’ll get a beer together. And they do this all the time actually. They do it because we’re friends.

My opinion is pointless. It’s so loaded with the cynicism of a failed musician who just hates for the sake of hating that I wouldn’t want my bands to ever be affected by it. No matter what I think of their new album, or how far they’ve strayed from their “core sound,” or how the snare is mixed on “that one track,” or how the singer’s hair has changed for the worse, I am not qualified to judge ANYTHING about these bands other than their guitar playing and their love of Orange amps. I’d be shitty at my job if I did.

What I’m laying out for you is a path to getting the most out of your endorsement. You need to be friends with your artist relations rep. You need to ignore my tastes and my subjective opinions. You need to learn how to work with me as much I need to learn to work with you. We don’t all like every band we endorse. Coming to your show isn’t necessarily the most enjoyable thing for us. Coming to see YOU is where we often derive the most reward.

Some quick tips when it comes to having an artist out to your show:

  • Remember where we live and remind us about your concert a couple of weeks in advance.
  • Invite us to your soundcheck. This is a great time for us to get some one on one time on stage in front of your rig. We can snag pictures and video clips of you talking about your gear in a more relaxed environment.
  • Please give us All Access passes. Aftershow passes are usually pointless (and many of us can’t stay to hang out anyways). We want to be able to get great content for social media and marketing purposes. All Access ensures we can move around freely and capture awesome B-Roll footage. If you’re worried about your Artist Rep having All Access because you don’t trust them, then you need to reevaluate your relationship.
  • Feel free to put us off on your tech or TM if you’re busy. Artist Reps love the crew. They are usually the ones we work with most often for logistics and support anyways. Plus, the crew is a great resource for us when it comes to meeting other bands, since many of them work with more than one band.
  • Let us drink your free beer. Maybe we’ll buy you hard liquor with our company credit card.

Take some time with your Artist Rep to understand their company. You play their brand on stage, but do you really know how the company operates? If you don’t, then you are probably either A) the type of artist who complains about not being supported enough, or B) lazy. I know this because if you had taken the time to learn the inner-workings of the company you’re dealing with, you’d be cross-promoting your relationship with them right now instead of reading this article.

Music instrument companies come in all shapes and sizes. It just happens that about 98% of them come in Size Extra Small. We’ve all got minimal operational budgets, 10-30 employees, and one Facebook page. What I’m trying to say is that the bulk of the work is often up to you. You truly have to make your endorsement what you want it to be.

Put me on your email list, send me the link to like your social media pages, and send me pics or videos of you playing live when they feature the product you endorse. Let me know when you’ve got a tour, music video shoot, or PR scheduled. Going into the studio? Let me know. Coming into my hometown and want to invite me to a show? Yes, absolutely. Even if I can’t go, it’s always worth asking. Because when you keep me in the loop I’m able to line up YOUR plans with MY marketing promotions and product releases.

There’s only one of me working with 1000 of you. Every AR guy feels this way. Try to be their friend and keep them up to date. They don’t have to love your music. They just need to love you!


We are a partner in this year’s Firestone Battle of the Bands, a competition that gives unsigned acts the chance to showcase their musical talents and be in with a chance of winning a great set of prizes.

Entries are now closed but 6 spotlighted artists have been chosen by us and campaign partner PMT and a public vote to choose the 3 finalists opens on Monday 13th November.

Keep an eye on our social media and Firestone’s Facebook, vote, share and #BeHeard

By Jason DeLorenzo

Many guitar players obsess over size and sometimes it comes down to, do you want to look cool on stage with your 4×12? Small combos or 1×12 cabinets don’thave the impact of a giant cabinet on stage.

The audience might not be as phased by this as the entertainer might be but still a very serious manner when discussing overall tone. The build of the cabinet matters but so does the size of your cabinet.

Volume and air push are important. Most 4x12s will project a beam of sound wherever they are pointed vs. an open back 2×12 that allows the sound to escape from the back of the cabinet as well. A more in-depth look at the guitar cabinet market brings an abundance of choice.  As mentioned, with your speakers generally number 1 to 4 in single cabinet regardless of the speaker-overall dimensions, quality of build, open back and closed back options available it can begin to seem overwhelming. To further complicate manners manufactures will change the size or bracing of their standard cabinets for specific amplifiers to create pairs that seemingly only stand on their own. This could be done in response to how the amplifier was made and if it lacks certain frequencies for example. It could also be sold such as the Jim Root Terror or 212PPC cabinet, more of a signature look to the overall presentation, black tolex and signature vs orange tolex. The Jim Root cab is also the same size as the 212OB but made as a closed back with custom speakers. Similar to the standard Orange cabs be clearly a unique creature that stands alone.

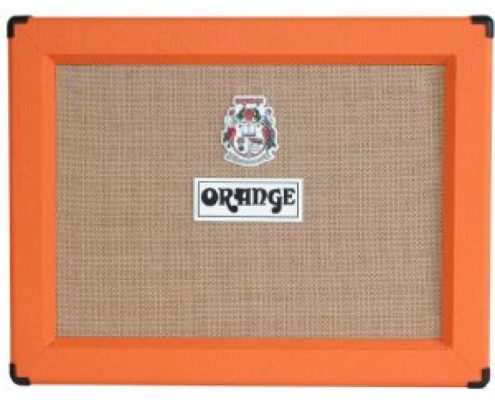
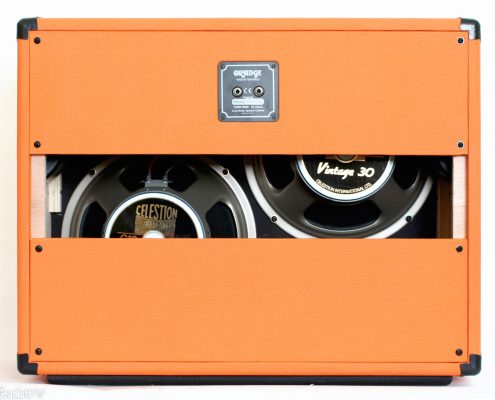
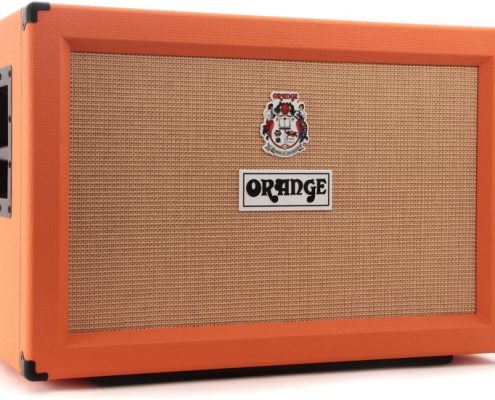
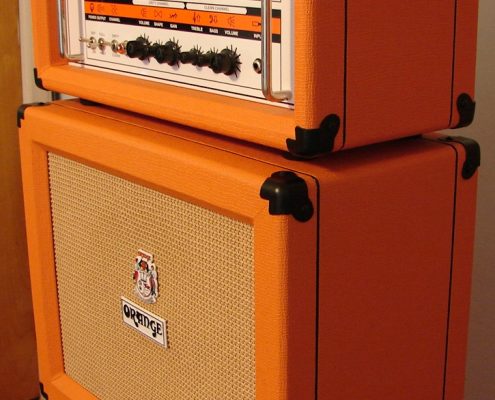
Similar to using lower wattage amps in the studio, smaller cabinets find a time to shine in this setting. A single speaker housing allows the listener to truly hear what is going on and not be completely blown out of the room. Another nice 1×12 feature is its easy speaker swapping ability to hear the interaction with a particular amp if you are after a detailed sound. If I had my way I would have an army of 1x12s each with a different speaker; a little crazy but hey, aren’t we all? We areguitar players after all; those creative juices emanate from somewhere.

A step up to the 2×12 creates more air movement and sound output generation. In this case, housing two different speakers in the same cabinet could yield wonderful results. Different speaker pairs can be used or combining the same speaker with multiple microphones during sessions can vary results. Different microphones dedicated to each speaker could allow for phase issues to be handled well if you have trouble mic’ing them up. Hands down, for me, the Orange 212s are hard to beat. The 212OB is a bit smaller but packs a punch. Great sound up front and with the open back, it fills the room—guitar everywhere! In a live setting it may or may not work as well but the 212PPC pushes all the air out the front.

With a larger build and solid construction, it feels like a 4×12 crumbling the ground beneath your feet. Naturally wattage needs to be a factor in all cases but is particularly important when using 1-2 speakers. Plugging a 100-watt flamethrower into a single Greenback might blow the speaker on the first chord, so size and wattage matters. Always verify that the total speaker wattage can handle the output of the amp. Always make sure the correct connections are made as far as the ohm in/outs as well. The last thing wanted is a blown tube amp or speaker!

Studying the jungle, the mighty and well-known 4×12 is the king of cabs. Looks great and sounds massive. More guitar? You got it! Yes, please, and thank you.

Certainly it is not as practical as the aforementioned 2×12 unless wattage and volume is vital. Generally known for blowing you right out of your sneakers these cabinets are big, provide the look of a pro and make sure the guitars are loud whatever the venue. Mixing and matching of speakers is a great way to make use of the 4 slots available to provide a more refined tone if required. These cabinets also have their place in the studio but can pose a space challenge depending on your studio. If you are like me, your experience playing live has taught you that a
lot of sound guys roll their eyes when they see you and a bandmate dragging a 4×12 through the back door.

Many times I have been told to “turn the cabinet around to face the wall,” they will mic it up and “be sure your volume is turned down.” What good does that do if there are no monitors, I can’t hear a thing! So much for being big and bad. How is a tube amp to shine, truly shine, at low
volume?

What is right for you? I don’t believe you can go wrong with any of these cabinets, especially under the Orange roof. I personally only use these cabs as I have found them to be the best of the best. The ‘PPC’ stands for “Power Projection Cab” and I believe that has been accomplished, these cabs can project. The 112CB and 212s spit out enough fire depending on the head you plug into. And a couple of 112s certainly looks nice and tidy like a mini stack while being easy to carry around yourself. On the other hand, have you ever tried moving a 4×12 up and down a flight of stairs solo? Never an enjoyable process but hey, they do sound great and you’ll look cool once you catch your breath (or maybe you’ll be blessed and snag a couple roadies!). What is paramount truly comes down to application and what you are doing at that given moment. Having a modest rig at home and one to take to rehearsal or a show is a great solution if your wallet can swing it. Keeping your 1×12 at home and taking the monster 4×12 to gig with might be the best way to get it on.

Technology is getting better daily as the digital market expands into all avenues of convenience. So is it possible that guitar tube amplifiers will take a final bow like the tube radio? Can solid state emulation replace all the nuances created by tube amplifiers? Let’s discuss!

On an expedition through the gear smorgasbord the tube amp might be the last piece of the equation to be replaced. Recent years have brought a leap forward with solid state amps, amp software, pedals and cabinet simulators flooding the
market. I am a believer in a few of these items in my own studio. Cabinet simulators play a larger role in my recordings than the others. I have been impressed by the offerings of current manufactures in the pedals, solid state amps and software emulation available as well. Admittedly a lot of guitar parts I record now days utilize Two Notes technology within their Wall of Sound plug in.

I do not necessarily need a huge mic locker or guitar cabinet warehouse with different size cabinets, speaker choices and ohm capacities. This advance made by Two Notes has minimized the amount of setup and has exponentially increased time to experiment more efficiently while also not blowing up my ears in the process. Of course I still own multiple cabinets, with multiple speakers and with different ohms—it’s just a different feel to the music. The more tools the better in my opinion—after all, every song is different and requires its own stamp on the musical landscape.

Sophisticated pedal such as the Orange Bax, (which features on-board EQ, Gain and a cabinet sim—yes, all this from just a pedal!) can offer originality to your playing. Insert that in your chain and turn your silverface into an Orange! If pedals can push the limits, what can be done in a larger format head or combo amps? The differences between a tube amp and a solid state are still noticeable overall and it might just come down to the irregularities of tube performance that create those beautiful noises with all that power running through them.

As far as tube amps go, my tube locker contains all sorts of letters and numbers each with their own sound palette. For this reason I believe there is more fun to be had with a tube amp. Some tubes can really open up the sound or dull it beyond belief. The ability to change from an EL34 British type power section to a more American style 6L6 is a good time in experimentation. At other points, a little something different is needed and altering the power section is a great feature on many amps that provides a ‘new’ amp in your arsenal.

Then there is the ‘fun’ factor of the preamp section—overall preamp, each channel, phase inverters and reverb! Any where from 2-8 tubes can be swapped for different shade in the sound. For additional options change the speaker or the cabinet that is part of the rig and boom, new sounds. There is a lot of interaction that takes place between you, guitar, cab and the tube amp. Playful feedback is tossed into the mix and can be summoned when provoked.

Unfortunately all of that excitement begins to dim when a tube starts glowing a different color or suddenly fades out like a dying star. As we all know, there are legit worries with owning tube amps. Maintenance for one ranks higher than others. In some cases, opening them up should be left to the professionals. The internal guts of these wonderful boxes are delicate from the wiring, capacitors, transformers and, of course, the tubes. This can lead to an expensive effort to find what works in an amp or in the instance when a tube has lit for the last time. When a tube wears
out I generally start to question if I like the amp anymore and that is a good way to identify if a change is required. If you own a tube amp I would highly recommend Orange’s VT1000 for your tube testing needs. Alas, problems do not stop there. Weather impacts performance, moving them around without harming the tubes is a worry, what if a fuse fails, is a backup needed to gig with?–you get the idea.

On the other side of the musical rainbow is the solid state amp. Worries are gone with solid state, right? Sure, there could be harm bestowed moving the amp from practice space to gig but no tubes to fail, no fuses to worry about. At 8 o’clock it sounds the same at 3 o’clock on the master volume. No breakup changes to worry about when cranking to get more volume over your drummer. Life is good.

Another improvement in our toolbox is modelling software. Imagine having every amp you have ever dreamed about within your computer or a small box that takes up less space than one amp head available to you at all times. I’m interested! The advantages are definitely tempting. All the back breaking amps, cabs and combos can stay at home. Simply show up with your computer or modelling amp and go direct into the soundboard. Which almost seems like blasphemy to a stage setup though your back will thank you, perhaps a cheaper alternative in the long run and certainly less dangerous in upkeep. The con list extends more to the tone side as there is less chances to experiment with tone changes due to lack of tubes and reliance on pedals almost becomes mandatory. Pedal dependency is a personal choice driven by what style you are playing. I
adore the edge of breakup tone, pushing the power section to break is glorious. With a solid state amp, that line in the sand no longer exists unless it is built to simulate that classic tone.

The edges can become blurred once the guitars have been recorded. Which track is solid state? Which track is an emulator? Which track is tube? I have mixed solid state and tube amps on a few occasions and I still hear the difference between them, even if they do sound good together, they are still not entirely equal. The difference becomes clearer when you start mixing all those sounds together. Certain sections stand out a little more than others and you might not be able to tell which is which but the alteration is heard.

I have been impressed by many different solid state heads and I had the pleasure of playing the Crush series as well as some of its competitors lately. Certain software packs sound pretty good but not enough that I say—that’s it, I am buying it! Sorry UAD!
I am not putting down the solid state crowd, I just don’t believe we are there…yet. Is the tube amp safe? I believe it is but in another 10 years the tube purist in me might be shaking in my boots. For me there is just too much interaction between that tube amp and guitar that could be missed with solid state.

Obviously I am not solid on the idea of bidding goodbye to my tube amp arsenal but I have been swayed on other advances as stated. The time is coming and it is close, when the tube amp might be a tool of the past; or at least one where we self-proclaimed purists are the only believers requesting to be buried ensconced with our tubes.


A pedalboard’s primary function is to provide a home for your beloved pedal collection as well as making life a little easier out there on the road, but they are not solely the domain of effects pedals per se. Pedalboards can also provide a haven for other guitar-orientated bits and pieces; some of which might not be that familiar to some of us. So with that in mind what else might we find lurking in the dark corners of a pedalboard other than effects pedals…

Amp Controller
The footswitch for your amp (if it has one) is probably the most common inhabitant of a pedalboard after effects pedals.

They come in all shapes and sizes…

They come in all shapes and sizes…


Power Supply
If you’re running pedals, you’re probably going to need power. What format it will take on your board (if it’s even on your board at all) is up to you. Besides batteries, the choices are power-banks such as those by T-Rex or Voodoo Labs, something like Pedaltrain’s Volto or direct from the mains.

There’s something to suit all tastes…

There’s something to suit all tastes…

Wireless System
If you like to go jumping about the stage like you’re possessed by some kind of rock demon (we like to think that these really do exist), a wireless system may be a necessity. They’ve evolved over the years and where older versions were slightly cumbersome (more often than not they were designed to be part of a rack-mounted setup) some of the newer breed such as Line 6’s Relay Series or Shure’s GLXD have been designed to be pedalboard friendly.

wireless


Buffer
If you’re a pedal board junky then you’re probably aware of these already. They give your signal a little more oomph to make sure it gets through all those pedals and all that extra cable without losing any of its sparkle. Several manufacturers produce bespoke buffers; Boss on the other hand include them in the majority of their pedals as standard.

buffer

Custom Audio Electronic’s MC406 and JHS’ Little Black Buffer…

Loop / Bypass Pedal
It could be argued that these fall into the category of effects pedals but strictly speaking a loop / bypass pedal such as One Control’s Crocodile Tail or MXR’s Loop Box are more utility pedals rather than effects.
Loop pedals (not the recording kind to avoid any confusion) allow any pedals contained within the loop(s) of the unit to be simultaneously taken out of your signal chain with just a single stomp (so no more tap dancing). If it’s a programmable unit you can assign particular loops containing certain effects to specific footswitches.

As complicated…or as simple as you want…

As complicated…or as simple as you want…

A/B/Y Switch
Similar to loop / bypass pedals in that they allow you to re-divert your signal, AB pedals allow you to break your signal chain into 2 parts (or more sometimes) and use either one side or the other…or both if there’s a ‘Y’ involved. Why would you want to do this? Well if you use more than one guitar rather than unplugging every time you swap you simply plug both into the AB box and select either with the stomp of a switch. Alternatively you may want to run more than one amp. Simply connect an amp to either output of the AB box and you’re good to go *.

* If you’re running more than one amp please remember that you need a speaker load for each amp; don’t plug 2 amps into 1 speaker cab because things will go bang (and not in a good way).

A, B or indeed Y…

A, B or indeed Y…

DI Box
Lots of pros run a DI (Direct Input) box straight from their boards to get a signal straight to the sound desk. This clever bit of kit performs various tasks (such as level and impedance matching) to ensure that your line signal is compatible with the desk.

To DI or not to DI; that is the question…

To DI or not to DI; that is the question…

Tuner
Not much to say about these really; every pedalboard should come with one as standard.

Turn on, tune in and rock out…

Turn on, tune in and rock out…

Noise Gate
These clever little boxes keep hisses, squeals and any other unwanted sounds to a minimum by controlling the volume (amplitude) of the signal. In simple terms they allow a signal through only when it is above a set level i.e. the gate is ‘open’. When the signal falls below this level no signal is allowed through i.e. the gate is ‘closed’.

Silence is golden…

Silence is golden…

If you’re into pedalboards then this is all probably common knowledge. But if you’re not, some of this stuff may be new to you and so the next time you see a board and think to yourself what is that little (or not so little) box you now might have the answer. Pedalboards can be home to lots of things such as mic stands, pick tins and slide holders, so when it comes to what a pedalboard is used for the world is quite literally at your feet.

By Guest Blogger Darren Carless

Previous blog articles have briefly looked at the types of effects that are available to modern guitarists, what you need to be thinking about when taking your first steps into the world of pedalboards, and the enigma that is the effects loop.

With those previous editions in mind, this article looks at arranging your selection of effects in order to optimise their performance and get them doing what you want them to. The way in which your effects are arranged has a massive impact on your overall sound. This is because they will all react differently depending on where they are placed in the chain due to the signal that is fed into them (i.e. pure guitar signal or signal from another effect).

Deciding upon your setup is a big decision…so how do you know which way is right and which is wrong? Well as you’ve probably come to expect by now (as with everything else when it comes to your setup) there is no right way or wrong way to chain your pedals together…it’s simply all about finding out what’s best for you!

The general consensus on the proper arrangement of effects is as follows…

  1. Dynamic effects (e.g. compressors)
  2. EQ’s and filters (e.g. wah-wah)
  3. Drive effects (e.g. overdrive, distortion and fuzz)
  4. Modulation effects (e.g. chorus, phasers and flangers)
  5. Delays / Echoes (although more often than not these can be found in the effects loop of the amp)
  6. Reverbs (also usually found in the effects loop of the amp

This arrangement means that the raw signal (i.e. from your guitar) is straightened out and refined first, before being distorted and boosted and then made to wobble. Next echo is added to the modified signal and finally it is reverberated.

Here’s a few suggested setups and what you can expect from them…

‘NORMAL / STANDARD’

normalstandard


This follows the order above and is a good place to start if you’re trying to get to grips with arranging your effects. This is considered to be the classic setup.

‘ALTERNATIVE STANDARD’

alternativestandard


This is a common variation on the standard setup. Here the wah-wah and the modulation pedal are swapped around. This arrangement will make the wah-wah stand out a lot more. When using older (more often than not analogue) modulation pedals it can be worth experimenting and placing them before your drive pedals, as sometimes they can sound a bit mushy when placed after.

USING THE EFFECTS LOOP

using-the-FX-loop


If your amp has an effects loop it’s always worthwhile trying your delays and reverbs in it (modulation pedals are often placed in effects loops too). This setup will usually mean that your delay and reverb will sound more prominent. It will also simplify the signal going into the front of your amp.

THE SQUASH

squash


Compressors should always be placed at the start of your chain, as their job is to even out the dynamics of the signal. Putting them later in the chain will only amplify any noise built up before them. You could also try this arrangement with a wah-wah positioned between the compressor and modulation pedal.

So there you go…as easy as that. If after reading this you’re sat there thinking it all looks and sounds very complicated (although it can be if you want it to be) don’t be put off as in reality it’s very simple…you get a pedal and plug it in, then you add another to it, then you swap them around and then add others and change the order until you find the sound that you’re after. Some decisions will be made for you (e.g. if your amp doesn’t have an effects loop you’ll have no choice but to put everything into the front of your amp) but for the most part it’ll be down to your personal preferences. Remember when it comes to effects experimentation is the key so get your hands on some and get stuck in!

It’s quite evident that the effects loop is still greeted with mixed reviews even though it’s been with us for quite some time now and is a very common feature on many guitar and bass amplifiers such as Orange’s TH30 and OR15. In order to gain an understanding as to whether the effects loop is a friend, a foe or simply something that is misunderstood, let’s start at the beginning and get to grips with the history and basics of the effects loop.

The effects loop first appeared in the 1970’s but it was the 80’s that really saw it come to prominence. Why the 80’s? Well…prior to that decade amplifiers only had clean channels and any effects used (more often than not tremolo and reverb) were usually built into the amp. When overdrive and distortion became popular amps began sporting a designated ‘overdrive’ channel and it was quickly discovered that putting effects into the front of the amp, as had been done previously, didn’t necessarily create the desired sounds. The effects loop was created in response to this problem and allowed the placing of effects after the preamp but before the power amp.

Effects loops are usually found on the rear side of the amplifier (not always though) and are normally identified as ‘Send’ i.e. Output and ‘Return’ i.e. Input. They tend to come in one of two varieties: a ‘series’ loop (all of the signal is passed through the effects in the loop) or a ‘parallel’ loop (part of the signal passes through only the amp, while the other part passes through the effects loop and is then mixed back together with the clean signal).

Untitled (1)

So now that we have a basic understanding of what the loop is and does, why would you want to use it? There are a number of benefits to be gained when using an effects loop. The biggest advantage is that effects placed in the loop tend to sound clearer and more pronounced. Another bonus is that by placing effects in the loop there is less likelihood of any signal loss due to an impedance mismatch, which can occur when using rack-mounted or pedal-based effects (to help with this many effects loops have a level/gain control).

Using the effects loop does have its negatives as well. You do need to run extra cables in order to use it (like we don’t already have enough of those). There is also the fact that the extra cable length for the loop can actually change your signal (it may weaken it or cause tone loss).

So if you decide to use the loop, what effects should you put in it? The general consensus is that time based effects (e.g. delay, flange, chorus etc) sound better in the effects loop whilst dirt effects (e.g. overdrive and distortion) and compressors work best in front of the amp. This, of course, is all subjective and there is (within reason) no right or wrong way to set up your equipment. It is worth considering what you are trying to achieve when using an effects loop however. Take a booster pedal for example, which works in either position. But a booster in front of the amp will only drive the preamp harder, and if you’re already rocking out a load of gain on the amp, you won’t really notice much difference. However, if you place it in the loop, a booster will give the whole signal a shot before it reaches the power amp and should increase the overall volume.

As an avid user of the effects loop I’ve read lots of material on the way they should be used and what benefits they can bring to your setup. This led me to my decision to set up my gear with the loop in mind. The other guitarist in my band can’t even begin to get his head around the need for extra leads, never mind the concept of the loop or how it works. As mentioned above there is no correct method to setting up your gear and, just like the choice of guitar, amplifier and effects pedals are all down to personal taste, whether or not you choose to use the effects loop is also a personal preference. That said the next time you have a look around the back of your amp and see those two sockets just bear in mind what they could actually do for you. They may open a whole new world of extra tonal options and you may find out that the effects loop is something that should be explored and not feared.

Guest Blogger: Darren Carless

How did you come up with the circuit?
It was during a night of terror. A lizard appeared and looked me right in the eyes. In his deep marble eyes I saw an amp next to an A4 pad of paper. He was a tiny terror. [Adrian wanted to design an amp that could “fit on an A4 pad of paper.”]

What’s the ethos behind the circuit?
Everybody wants to play a show and have a couple of beers without having to drive. The Tiny Terror allows you to do just that because you can easily carry it. Call up one of the other bands on the bill and ask if it’s cool to borrow their 4×12. Play the show with volume on 10, tone on 10, gain around 12 to 2 o’clock and get right into the output tubes. The guy you borrowed the 4×12 from has a 100 watt marshall with the pre-amp on 9 and the volume on 2 sounding like a dentist. Your cranked TT geetar sound is SOOO good that you attract the attention of some of the laydeez :) You wind up going to a party with them, still carrying your Tiny Terror and your geetar and your night suddenly gets even better :)

How does the circuit work?
Simply, it’s this, the first gang of the gain pot increases the gain of the first stage. The second gang of the gain pot increases the impedance of the second stage. This results in the signal pushing into the output tubes evenly all the way up. The phase inverters in a lot of amps is complete snollygoster. The one in the TT is perfect. The EL84s have the best distortion sound, the cathode biasing gives you more smerge swomp. This results in the pancakes being thick in treacle [molasses]. Thicker than the dude you borrowed the 4×12 off of.

Technical Director Adrian Emsley (Left) with Dr. Damon "I Wear Bike Shorts In The Winter" McCartney (Right)

Technical Director Adrian Emsley (Left) with
Dr. Damon “I Wear Bike Shorts In The Winter” McCartney (Right)

Interview by Dr. Damon McCartney